I have a Win7 qemu VM passed a gtx 750 and a keyboard+mouse, and the following is a rough guide, inspired from other similar guides which didn’t quite work for me or weren’t informative enough.
Background:
I’m running 64bit Debian Jessie with Qemu/kvm from stock apt. I’m not using libvirt for, as the older version in Debian’s apt does not support -cpu kvm=off among other things. This is a file server/VM host that I choose to use headless, and now it also functions as a very capable gaming rig thanks to virtualization.
root@machina:~# qemu-system-x86_64 -version
QEMU emulator version 2.1.2 (Debian 1:2.1+dfsg-12), Copyright (c) 2003-2008 Fabrice Bellard
root@machina:~#
Hardware (bought from Fry’s in Sunnyvale, CA):
The most important part of that CPU is that it supports vt-d which is used for hardware pass through to VMs. It’s also damn fast which helps for gaming performance.
I chose that Gigabyte brand of board as ones related to it have been reported working. I have since added the working setup here to that doc.
Also, I’m using nvidia driver version 335.23 (the oldest that supports this card) as apparently that is the last to require -cpu kvm=off. I have not tried newer drivers as this one works very well, and if it ain’t broke slow don’t fix it.
I’m using win7 as the tablet-UI in later Windows releases suck ass and I had an iso lying around already.
Step 1: Get a supported kernel and tweak grub boot options
Step 1.1:
Because I am using intel integrated graphics, I’m using 3.18.0 with the i915 patches (google). I should be using a newer kernel instead as this one is hella old, but it works and this box isn’t internet facing. I recommend compiling the kernel on an SSD.
I should include a guide for this later for those who aren’t used to compiling kernels.
Step 1.2:
Set the following in /etc/default/grub. Enable i915 patch and intel_iommu.
GRUB_CMDLINE_LINUX="intel_iommu=on i915.enable_hd_vgaarb=1"
Run these:
sudo update-grub
Step 2: Device finding
Make sure your iommu groups are correct.
These are the devices I’m passing. Note the preceding numbers and the vendor:device id pairs:
joe@machina:~$ lspci -vnn | grep -i nvidia
01:00.0 VGA compatible controller [0300]: NVIDIA Corporation GM107 [GeForce GTX 750] [10de:1381] (rev a2) (prog-if 00 [VGA controller])
01:00.1 Audio device [0403]: NVIDIA Corporation Device [10de:0fbc] (rev a1)
joe@machina:~$
Also my separate keyboard/mouse. (A usb apple keyboard from ~2001 + a cheap usb mouse + cheap usb sound card + wired xbox 360 controller)
joe@machina:~$ lsusb
..
Bus 003 Device 009: ID 093a:2510 Pixart Imaging, Inc. Optical Mouse
Bus 003 Device 006: ID 05ac:0204 Apple, Inc.
Bus 003 Device 011: ID 0d8c:000c C-Media Electronics, Inc. Audio Adapter
Bus 003 Device 010: ID 045e:028e Microsoft Corp. Xbox360 Controller
...
Step 3: Networking
Configure qemu networking. I have my eth0 bridged to br0 (that is a separate article), and the following conf needs to exist to pass br0 to the VM. I am using qemu’s bridge helper rather than creating the tap devices manually. br0 corresponds to the bridge name in both snippets below.
qemu bridge helper (this file won’t exist by default):
root@machina:~# cat /etc/qemu/bridge.conf
allow br0
root@machina:~#
network bridging conf
There are lots of ways of doing this, but this is mine. If you choose to go this route, install bridge-utils with apt.
root@machina:~# cat /etc/network/interfaces
auto lo
iface lo inet loopback

iface eth0 inet manual
auto br0
iface br0 inet dhcp
bridge_ports eth0
root@machina:~#
Step 4: VM Start Script
Script I run. Interesting parts that will change for your setup are in bold.
#!/bin/bash
vfiobind() {
    dev="$1"
        vendor=$(cat /sys/bus/pci/devices/$dev/vendor)
        device=$(cat /sys/bus/pci/devices/$dev/device)
        if [ -e /sys/bus/pci/devices/$dev/driver ]; then
                echo $dev > /sys/bus/pci/devices/$dev/driver/unbind
        fi
        echo $vendor $device > /sys/bus/pci/drivers/vfio-pci/new_id

}

modprobe vfio-pci

for line in 0000:01:00.0 0000:01:00.1; do
vfiobind $line
done

sudo qemu-system-x86_64 -enable-kvm -M q35 -m 4096 -cpu host,kvm=off \
-smp 4,sockets=1,cores=4,threads=1 \
-bios /usr/share/seabios/bios.bin  -vga none \
-device ioh3420,bus=pcie.0,addr=1c.0,multifunction=on,port=1,chassis=1,id=root.1 \
-device vfio-pci,host=01:00.0,bus=root.1,addr=00.0,multifunction=on,x-vga=on \
-device vfio-pci,host=01:00.1,bus=root.1,addr=00.1 \
-drive file=/dev/vg-ssd/vm-win7,id=disk,format=raw,if=virtio \
-drive file=/dev/vg-ssd/vm-win7-slice2,format=raw,if=virtio \
-usb -usbdevice host:093a:2510 -usbdevice host:05ac:0204 \
-usb -usbdevice host:045e:028e \
-usb -usbdevice host:0d8c:000c \
-boot menu=on \
-netdev tap,helper=/usr/lib/qemu/qemu-bridge-helper,id=hn0 -device virtio-net-pci,netdev=hn0,id=nic1 \
-vnc :2
- It is highly irresponsible of me to run this as root, but it’s easy. If the guest manages privilege escalation due to a bug in kvm/qemu (like the floppy driver one months back), your box might get rooted and/or fucked. Keep your qemu packages updated! It might help that I’m using Debian stable rather than arch, as qemu might only be updated for security patches rather than new features which could break this.
- Without -vnc :2, this command requires a working GUI with SDL to run which sucks as I run this in screen from ssh. I also like being able to connect via VNC. This is not at all a boot menu or a gui interface to the VM, but rather a qemu debug command prompt. I recommend restricting access to this (port 5902) using iptables.
- kvm=off stops qemu from advertising the fact that it is running KVM to the guest. This is needed for newer nvidia drivers as nvidia refuses to work if it thinks its a VM
- -cpu host exposes all of the host CPUs to the VM nearly verbatim. From what I’ve read, this is the best option for performance.
- I’m giving it 4GB of ram (I have 16GB on the host) which is apparently plenty.
- The path to the seabios binary changes slightly per debian qemu release (dpkg -L seabios | grep bios.bin)
- I store my VM as LVM LVs/slices on an SSD. I hear that passing raw block devices (eg /dev/sd$X) to VMs doesn’t fare well, and I like being able to carve up the SSDs into other block devices for other VMs/etc. There’s also a possibility that using an LVM LV slightly avoids filesystem overhead you’d get if you were using a sparse file on ext4/etc.
- -boot menu=on probably does not need to be there but I like the verbosity it gives during the boot process
- That vfio bind function has been copy/pasted around various other articles.
- The modprobe stanza might not be needed.
During my install, I used the following. After I installed all of the virtio drivers, I stopped using the realtek nic and ide disks:
sudo qemu-system-x86_64 -enable-kvm -M q35 -m 4096 -cpu host,kvm=off \
-smp 4,sockets=1,cores=4,threads=1 \
-bios /usr/share/seabios/bios.bin  -vga none \
-device ioh3420,bus=pcie.0,addr=1c.0,multifunction=on,port=1,chassis=1,id=root.1 \
-device vfio-pci,host=01:00.0,bus=root.1,addr=00.0,multifunction=on,x-vga=on \
-device vfio-pci,host=01:00.1,bus=root.1,addr=00.1 \
-drive file=/dev/vg-ssd/vm-win7,id=disk,format=raw -device ide-hd,bus=ide.0,drive=disk \
-drive file=/dev/vg-ssd/vm-win7-slice2,id=disk2,format=raw -device ide-hd,bus=ide.1,drive=disk2 \
-usb -usbdevice host:093a:2510 -usbdevice host:05ac:0204 \
-boot menu=on \
-netdev tap,helper=/usr/lib/qemu/qemu-bridge-helper,id=hn0 -device rtl8139,netdev=hn0,id=nic1 \
-drive file=/srv/ssd/misc/vm/win7.iso,id=isocd -device ide-cd,bus=ide.1,drive=isocd
Appendix 1: screenshots!
- My mac mini connected as a steam in-house streaming client to the win7 VM: link
- Windows experience index: link
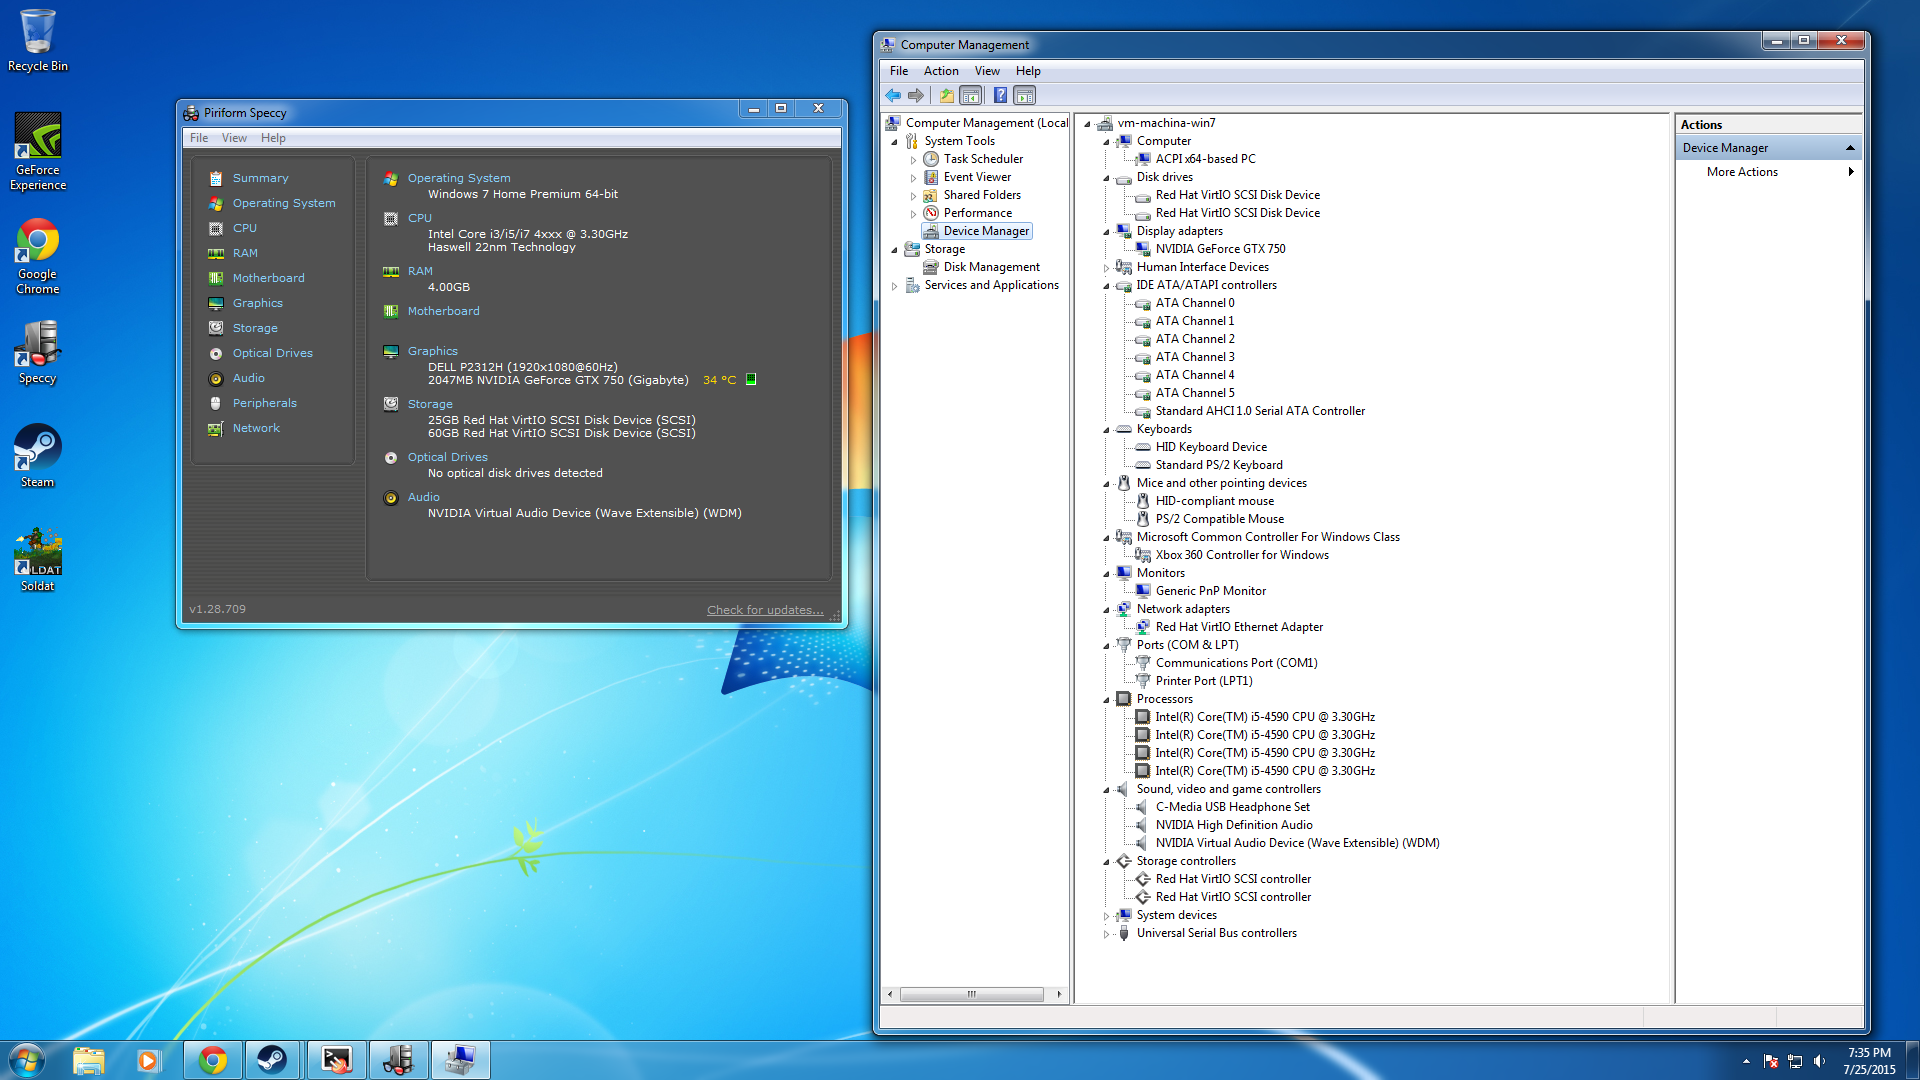
- Speccy/device manager (seeing a geforce card listed with the VirtIO drivers is mad trippy: link
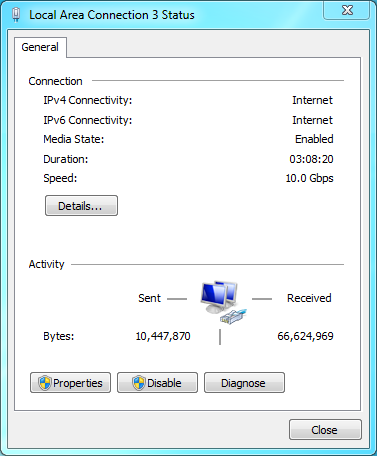
- VirtIO drivers make the network cards think they’re 10gig: link
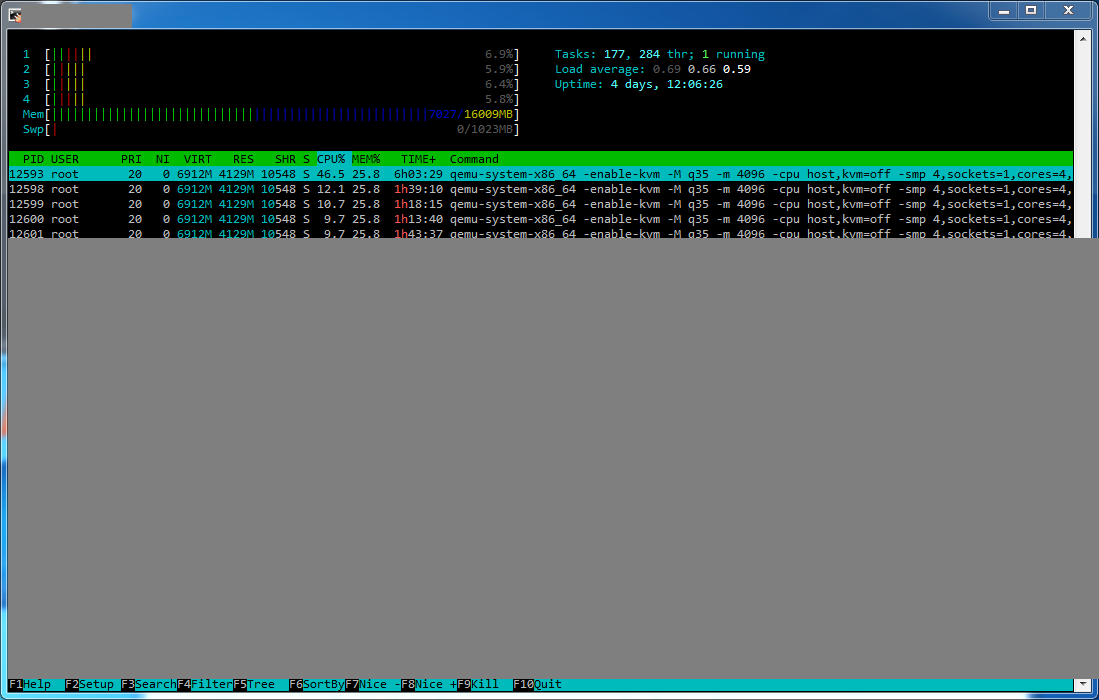
- htop on host showing the qemu procs: link
Appendix 2: links
There are some very good docs on this subject, and the steps I am using here is shamelessy ripped from them, albeit tweaked a little. Highlights/credits:
- Alex’s Wiki which should be treated as source of truth for the subject: http://vfio.blogspot.com/
- Google spreadsheet containing list of supported/unsupported hardware: link
- Forum thread with useful info: link