Using WireGuard with OSPF and Bird

I’ve long used OpenVPN’s PtP tunnels to set up star-style network topologies across the WAN, with dynamic routing set up using OSPF/Quagga.

WireGuard is new, allows simpler configuration, and is measurably faster than OpenVPN, so naturally I wanted to switch to it.

However, WireGuard seems to be aimed at smaller, simpler use cases, with its AllowedIPs configuration option being used to set up both static routes, as well as a form of allowlist regarding what traffic is allowed to flow through the tunnel. With this, I would have needed to hard code all subnets across the network in each end’s AllowedIPs, which would have prevented taking advantage of routing protocols to dynamically set up routes.

After a long time of wanting to be able to set up PtP WireGuard tunnels, with traffic allowed to flow freely within the tunnel a la OpenVPN, I finally found the answer.

This answer is not well known, to the point of people on mailing lists describing it as impossible. See this.

Wireguard

For this to work, using wg-quick, we need to utilize both the (uncommon) Table option as well as AllowedIPs.

The following is a simple working example.

Router A (acting as server):

Tunnel IP: 10.8.0.1/24
Also has access to: 10.30.0.0/24

Wireguard Conf (/etc/wireguard/wg2.conf):

[Interface]
Address = 10.8.0.1/24
PrivateKey = RouterA'sPrivKey
ListenPort = 8999
Table = off # This is the crucial part

[Peer]
PublicKey = RouterBsPubKey
AllowedIPs =  0.0.0.0/0

Router B (acting as client).

Tunnel IP: 10.8.0.2/24
Also has access to: 192.168.122.0/24 and 10.0.0.0/24

Wireguard Conf (/etc/wireguard/wg2.conf):

[Interface]
PrivateKey = RouterB'sPrivKey
Address = 10.8.0.2/24
Table = off # This is the crucial part

[Peer]
PublicKey = RouterAsPubKey
AllowedIPs = 0.0.0.0/0
Endpoint = RouterA'sWanIP:8999
PersistentKeepalive = 30 # Needed if B is behind a NAT

To explain: ordinarily when you set a peer’s AllowedIps to 0.0.0.0/0, this causes WireGuard to force all outgoing traffic to go through the tunnel by altering the host’s routing table to replace the default route.

The magic is when you set ‘Table = off’ the host’s routing table is untouched, and any traffic will now be allowed to float between the tunnel, with the potential for the user to set up any custom routes they want outside of WireGuard’s configuration.

After configuring the conf files, immediately enable the tunnels using, on either end (as we chose identical tunnel names) the following. Tested on Ubuntu and Alma/Fedora.

systemctl enable --now wg-quick@wg2

OSPF

Now that we have a tunnel that allows any traffic to flow, just like with OpenVPN, we need custom routes so all nodes connected to these subnets can easily find each other.

OSPF works well; I used Quagga in the past, but wanted to give Bird a try.

The bird conf for each Router is very simple, with only the wireguard interface name and stubnets being changed.

The following is for Router A.


## Boilerplate from distro
log syslog all;
protocol device {
}
protocol direct {
	disabled;		# Disable by default
	ipv4;			# Connect to default IPv4 table
	ipv6;			# ... and to default IPv6 table
}
protocol kernel {
	ipv4 {			# Connect protocol to IPv4 table by channel
	      export all;	# Export to protocol. default is export none
	};
	persist;
}
protocol kernel {
	ipv6 { export all; };
}
protocol static {
	ipv4;			# Again, IPv4 channel with default options
}

## Sauce
protocol ospf MyOSPF {
	## Boilerplate taken from Bird's example docs https://bird.network.cz/?get_doc&v=20&f=bird-6.html#ss6.8
        ipv4 {
                export filter {
                        if source = RTS_BGP then {
                                ospf_metric1 = 100;
                                accept;
                        }
                        reject;
                };
        };
        area 0.0.0.0 {
        	## What matters
		stubnet 10.30.0.0/24;
                interface "wg2" {
                        type ptp; # VPN tunnels should be point-to-point 
                };
        };
}

We define the WireGuard interface as type “ptp” as it is a tunnel.

Any accessed subnets or routes to be advertised, that are not attached to other interfaces defined, need to be configured as stubnets.

I prefer to only configure the WireGuard interface as this way unnecessary OSPF traffic is not sent to the other interfaces.

The Bird conf for Router B is the same as A except for the stubnet params, as both ends have their WireGuard interface named “wg2” for simplicity.

After both wireguard and bird are running, you can see the routes from ospf being created on the client host above:

[root@machina ~]# ip -4 ro 
*snip*
10.30.0.0/24 via 10.8.0.1 dev wg2 proto bird metric 32 
*snip*

[root@machina ~]# birdc show ro
BIRD 2.0.8 ready.
Table master4:
10.30.0.0/24         unicast [MyOSPF 2021-11-21] * I (150/20) [10.8.0.1]
	via 10.8.0.1 on wg2
Live increasing a KVM VM’s root partition

My mailserver’s root partition has gotten really full lately, and I didn’t want to incur downtime by taking it down to enlarge offline:

root@mail:~# df -hT
Filesystem     Type      Size  Used Avail Use% Mounted on
/dev/vda2      ext4       19G   17G  1.2G  94% /

I run my VMs on KVM and I use an LVM LV for each VM, and according to a SO post, it is possible to increase the size partitions within a VM online, so let’s go for it:

Firstly, ensure there is enough free VG space to make room for the slice and check its current size:

root@fireball:~# vgs
   VG   #PV #LV #SN Attr   VSize   VFree  
   vg1    2  16   0 wz--n- 836.74g 143.74g

Next, increase the LV:

root@fireball:~# lvresize -L +10G /dev/vg1/vm-mail 
  Size of logical volume vg1/vm-mail changed from 20.00 GiB (5120 extents) to 30.00 GiB (7680 extents).
  Logical volume vm-mail successfully resized.

Now that the LV is physically larger, we need to make KVM notify the guest that its disk has increased. First, get the virtio identifier:

root@fireball:~# virsh qemu-monitor-command mail info block --hmp
drive-virtio-disk0: /dev/vg1/vm-mail (raw)

Next, use that identifier like this:

root@fireball:~# virsh qemu-monitor-command  mail block_resize drive-virtio-disk0 30G --hmp
root@mail:~# 

Now, ensure dmesg within the VM indicates it has been notified of the size increase:

root@mail:~# dmesg -T 
[Fri Oct 18 20:21:53 2019] vda: detected capacity change from 21474836480 to 32212254720

Whenever I make a VM, I always make swap really tiny as vda1, and the rest goes to the root partition as vda2, so increases are always possible without a full reinstall.

Now, we need to physically resize the partition within the VM. We’re going to use fdisk to first take note of the existing root partition and its starting sector, then delete it, recreate it at the same start sector, and re-apply the boot flag.

First, learn what the disk layout currently is and the current start sector for the root partition:

root@mail:~# fdisk -l 

Disk /dev/vda: 20 GiB, 21474836480 bytes, 41943040 sectors
 Units: sectors of 1 * 512 = 512 bytes
 Sector size (logical/physical): 512 bytes / 512 bytes
 I/O size (minimum/optimal): 512 bytes / 512 bytes
 Disklabel type: dos
 Disk identifier: 0x6e63ab94

Device     Boot   Start      End  Sectors Size Id Type
 /dev/vda1          2048  2099199  2097152   1G 82 Linux swap / Solaris
 /dev/vda2  *    2099200 41943039 39843840  19G 83 Linux

Now we’re ready to delete and recreate the partition

root@mail:~# fdisk /dev/vda
 Welcome to fdisk (util-linux 2.25.2).
 Changes will remain in memory only, until you decide to write them.
 Be careful before using the write command.

Command (m for help): d
 Partition number (1,2, default 2): 

Partition 2 has been deleted.

Command (m for help): n
 Partition type
    p   primary (1 primary, 0 extended, 3 free)
    e   extended (container for logical partitions)
 Select (default p): 

Using default response p.
 Partition number (2-4, default 2): 
 First sector (2099200-62914559, default 2099200): 2099200
 Last sector, +sectors or +size{K,M,G,T,P} (2099200-62914559, default 62914559): 

Created a new partition 2 of type 'Linux' and of size 29 GiB.

Command (m for help): p
 Disk /dev/vda: 30 GiB, 32212254720 bytes, 62914560 sectors
 Units: sectors of 1 * 512 = 512 bytes
 Sector size (logical/physical): 512 bytes / 512 bytes
 I/O size (minimum/optimal): 512 bytes / 512 bytes
 Disklabel type: dos
 Disk identifier: 0x6e63ab94

Device     Boot   Start      End  Sectors Size Id Type
 /dev/vda1          2048  2099199  2097152   1G 82 Linux swap / Solaris
 /dev/vda2       2099200 62914559 60815360  29G 83 Linux

Command (m for help): a
 Partition number (1,2, default 2): 

The bootable flag on partition 2 is enabled now.

Command (m for help): w
 The partition table has been altered.
 Calling ioctl() to re-read partition table.
 Re-reading the partition table failed.: Device or resource busy

The kernel still uses the old table. The new table will be used at the next reboot or after you run partprobe(8) or kpartx(8).

root@mail:~# 

That warning at the end is expected and can be safely ignored. Last step is to resize the filesystem itself. Luckily ext4 lets you do this online in a single easy command:

root@mail:~# resize2fs /dev/vda2
 resize2fs 1.42.12 (29-Aug-2014)
 Filesystem at /dev/vda2 is mounted on /; on-line resizing required
 old_desc_blocks = 2, new_desc_blocks = 2
 The filesystem on /dev/vda2 is now 7601920 (4k) blocks long.
root@mail:~#

There, much better:

root@mail:~# df -hT
Filesystem     Type      Size  Used Avail Use% Mounted on
/dev/vda2      ext4       29G   17G   11G  61% /

This method is slightly dangerous if done wrong, but ideally you keep daily backups, right? Besides, why incur needless downtime and ruin a 320+ day uptime?

Phanteks p400s Custom Liquid Cooling Loop

I’ve been building computers/servers for roughly 11 years now–first build in 2006 was an Athlon 64 3800+ with a Geforce 6600–and I’ve always only cared about the components themselves, less so what the case or innards look like.

I hit a sort of “midlife crisis” where I wanted to make my home box look really cool. At the time it had 6 hard drives–two mdadm raid1 arrays + 2 SSDs carved using LVM–and I wanted to upgrade to a case with a window, as I was using a windowless Nanoxia Deep Silence 4. The DS4 is a great case but it’s not meant for flashyness. When I built it I hadn’t cared about cable management so it was a mess on the inside.

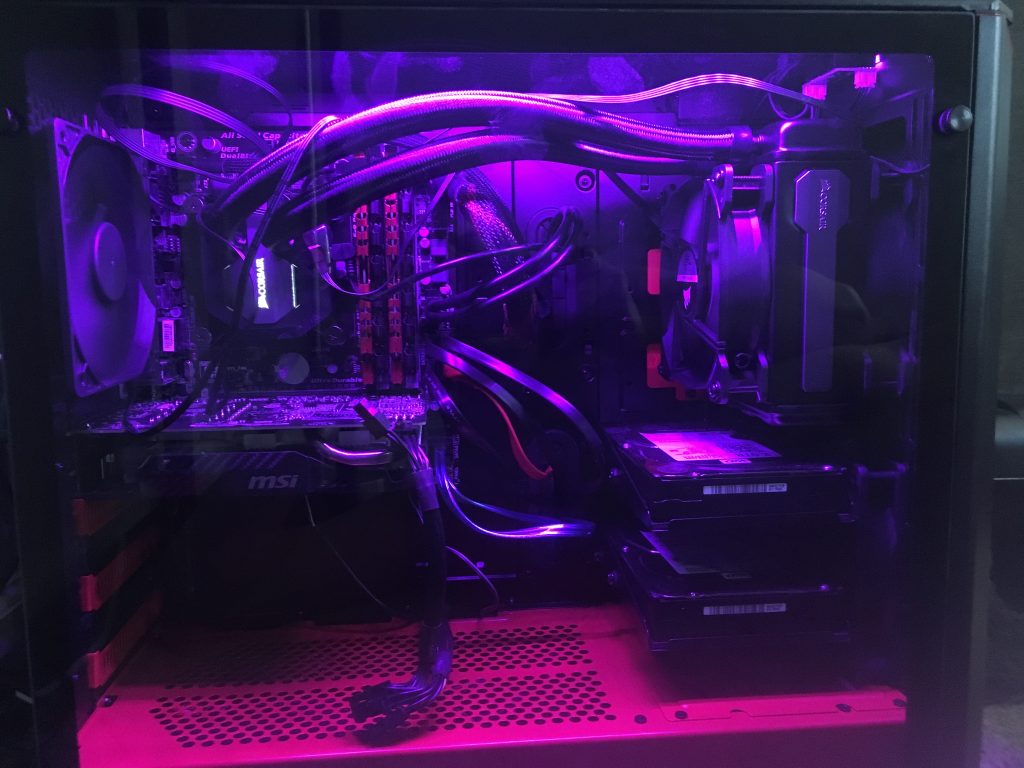
I opted to go with a Phanteks P400s TG Red Edition as it had a huge tempered glass side panel, LED lights, and room for 8 drives: 2 SSDs behind the motherboard panel, 2 3.5″ slots in the basement, and 4 optional drive slots in the front.

At some point I was convinced to try liquid cooling. I was able to fit a Corsair h80i v2 at the front of the case and it worked really well.

Yet I wanted more. I spent a month researching custom liquid cooling loops, mostly through reading EKWB’s excellent guides and watching Jayz2cents awesome water cooling tutorial videos.

I chose the P400s primarily for the drive capacity; at the time I was still averse to liquid cooling so I didn’t plan for it. The P400s falls short for liquid cooling in that the top can’t fit dual fans + a radiator as the motherboard is too high, and the length of the case doesn’t easily permit a custom loop with a full length graphics card. The basement has–undocumented–pump mounting holes but they aren’t useful when you have a radiator+fans installed.

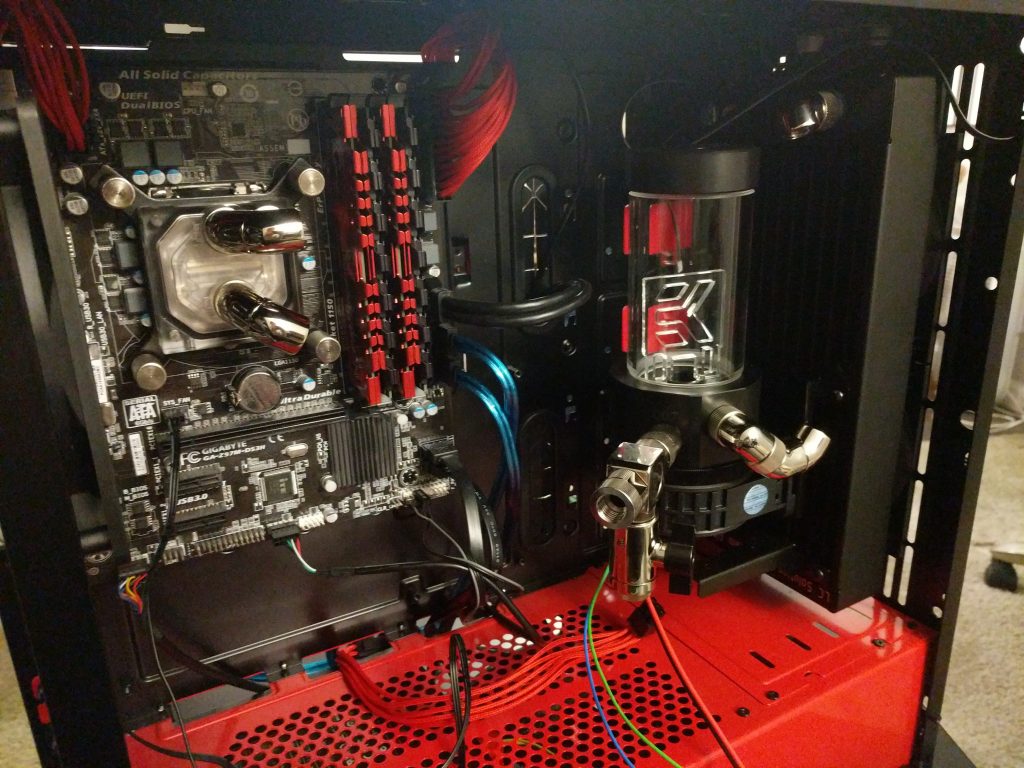
I opted to go with EKWB parts and a single 240mm rad in the front of the case with the pump+res combo mounted against the rad itself. It all came together quite nicely with a few caveats, after i migrated down from 6 drives to 4 to remove the extras visible in the case taking up radiator space.

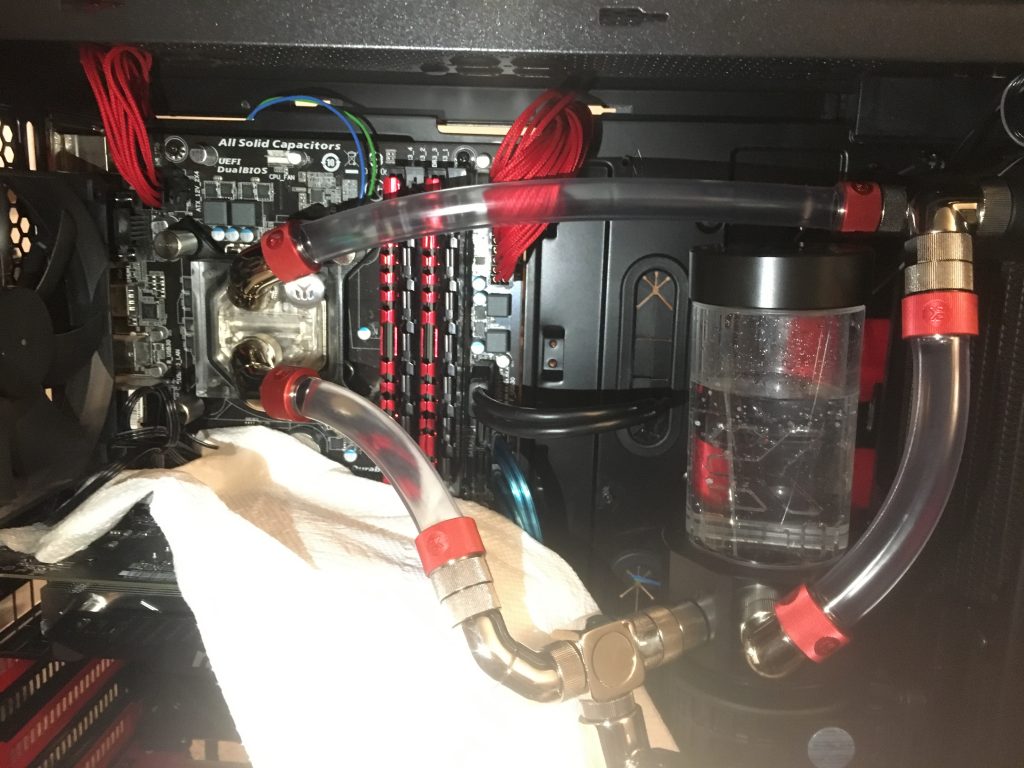
The pump+res combo mounted easily to the front of the radiator:

With all of the parts in place, the leak test (distilled water) was uneventful, likely due to using compression fittings:

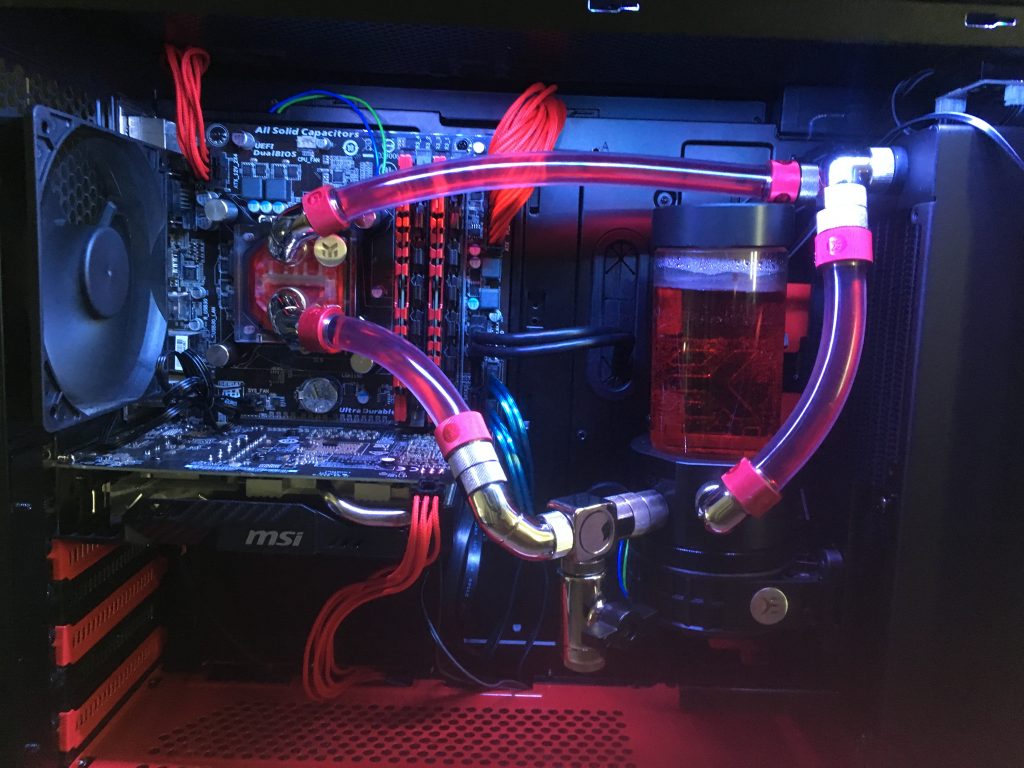
Here is the finished result:

There are several things I want to make better:

1) The drainage port should be less prominent
2) There isn’t room for a normal-length video card with the pump where it is
3) The CPU specs are a bit outdated and that part of this system is due for an upgrade

Future plans:

– Instead of mounting the pump+res against the radiator, drill holes at the bottom right part of the case so the reservoir tube is just flush against the radiator, to free up lots of room for a full length GFX.

– Get a new mobo/ram, with the i7-8700k when it’s back in stock

– Upgrade to a GTX 1080 with a water block, so I can add that to this loop

– At some point go with rigid tubing, now that I’ve had a good experience with soft tubing

It’s possible I’ll need more radiator space, and I’ll need to decide between adding 120mm radiators in the rear and the top-right part of the case, or going with a different case altogether. I’d like to avoid going with a separate case as alternatives either feel wasteful, look ugly, or are too big.

The Phanteks Enthoo Evolve is pretty much meant for custom liquid cooling loops, but I hate how the front of it looks. The Fractal Design series would work, but they just have window/plastic side panels instead of tempered glass.

Notable EKWB parts used:

EK-CoolStream PE 240 (Dual)
EK-XRES 140 Revo D5 PWM (incl. pump)
EK-Supremacy EVO CPU Water Block (Nickel)
EK-CryoFuel Blood Red Premix 900 mL
EK-AF Ball Valve (10mm) G1/4 – Nickel (for drain port)
EK-AF T-Splitter 3F G1/4 – Nickel (for drain port)
– 2x EK-Vardar EVO 120S (1150rpm)
EK-ACF Fitting 10/16mm – Red (6-pack)
EK-UNI Pump Bracket (120mm FAN) Vertical
EK-DuraClear 9,5/15,9mm 3M

Fixing Bluetooth audio in Ubuntu Xenial

I have a Sony bluetooth speaker I usually use with iPhone and Macbooks. I’ve wanted to use it with my Ubuntu Xenial (4.4.0-93-generic) desktop for a long time but never got around to getting a bluetooth dongle or an RCA cable.

Today I went to Fry’s to get some cables for another project and finally decided to grab a USB Bluetooth dongle. I picked up a Sabrent BT-UB40 as it claims to have Linux support.

The device was immediately recognized and supported in the Unity UI after plugging it in. It also supported pairing to my Sony speaker. However, when trying to “connect” the following messages were dumped to syslog:

Nov  5 14:02:49 machina bluetoothd[26700]: Failed to obtain handles for "Service Changed" characteristic
Nov  5 14:02:49 machina bluetoothd[26700]: Not enough free handles to register service
Nov  5 14:02:49 machina bluetoothd[26700]: Error adding Link Loss service
Nov  5 14:02:49 machina bluetoothd[26700]: Not enough free handles to register service
Nov  5 14:02:49 machina bluetoothd[26700]: message repeated 2 times: [ Not enough free handles to register service]
Nov  5 14:02:49 machina bluetoothd[26700]: Current Time Service could not be registered
Nov  5 14:02:49 machina bluetoothd[26700]: gatt-time-server: Input/output error (5)
Nov  5 14:02:49 machina bluetoothd[26700]: Not enough free handles to register service
Nov  5 14:02:49 machina bluetoothd[26700]: Sap driver initialization failed.

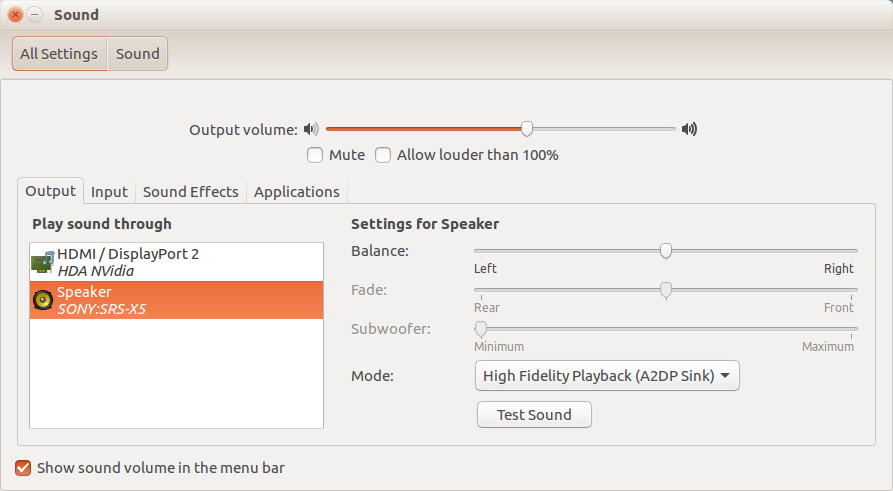
After a bunch of googling and looking at logs, installing the following package and then disconnecting and re-pairing the device makes it usable:
apt-get install pulseaudio-module-bluetooth

Proof:

Linux on the desktop has progressed significantly over the past 10 years in terms of UI to manage hardware, yet some polish is still needed to make things completely JFW out of the box.

Win7 KVM VGA Passthrough (gtx 750)

I have a Win7 qemu VM passed a gtx 750 and a keyboard+mouse, and the following is a rough guide, inspired from other similar guides which didn’t quite work for me or weren’t informative enough.

Background:

I’m running 64bit Debian Jessie with Qemu/kvm from stock apt. I’m not using libvirt for, as the older version in Debian’s apt does not support -cpu kvm=off among other things. This is a file server/VM host that I choose to use headless, and now it also functions as a very capable gaming rig thanks to virtualization.

root@machina:~# qemu-system-x86_64 -version
QEMU emulator version 2.1.2 (Debian 1:2.1+dfsg-12), Copyright (c) 2003-2008 Fabrice Bellard
root@machina:~#

Hardware (bought from Fry’s in Sunnyvale, CA):

The most important part of that CPU is that it supports vt-d which is used for hardware pass through to VMs. It’s also damn fast which helps for gaming performance.

I chose that Gigabyte brand of board as ones related to it have been reported working. I have since added the working setup here to that doc.

Also, I’m using nvidia driver version 335.23 (the oldest that supports this card) as apparently that is the last to require -cpu kvm=off. I have not tried newer drivers as this one works very well, and if it ain’t broke slow don’t fix it.

I’m using win7 as the tablet-UI in later Windows releases suck ass and I had an iso lying around already.

Step 1: Get a supported kernel and tweak grub boot options

Step 1.1:

Because I am using intel integrated graphics, I’m using 3.18.0 with the i915 patches (google). I should be using a newer kernel instead as this one is hella old, but it works and this box isn’t internet facing. I recommend compiling the kernel on an SSD.

I should include a guide for this later for those who aren’t used to compiling kernels.

Step 1.2:

Set the following in /etc/default/grub. Enable i915 patch and intel_iommu.

GRUB_CMDLINE_LINUX="intel_iommu=on i915.enable_hd_vgaarb=1"

Run these:

sudo update-grub

Step 2: Device finding

Make sure your iommu groups are correct.

These are the devices I’m passing. Note the preceding numbers and the vendor:device id pairs:

joe@machina:~$ lspci -vnn | grep -i nvidia
01:00.0 VGA compatible controller [0300]: NVIDIA Corporation GM107 [GeForce GTX 750] [10de:1381] (rev a2) (prog-if 00 [VGA controller])
01:00.1 Audio device [0403]: NVIDIA Corporation Device [10de:0fbc] (rev a1)
joe@machina:~$

Also my separate keyboard/mouse. (A usb apple keyboard from ~2001 + a cheap usb mouse + cheap usb sound card + wired xbox 360 controller)

joe@machina:~$ lsusb 
..
Bus 003 Device 009: ID 093a:2510 Pixart Imaging, Inc. Optical Mouse
Bus 003 Device 006: ID 05ac:0204 Apple, Inc. 
Bus 003 Device 011: ID 0d8c:000c C-Media Electronics, Inc. Audio Adapter
Bus 003 Device 010: ID 045e:028e Microsoft Corp. Xbox360 Controller
...

Step 3: Networking

Configure qemu networking. I have my eth0 bridged to br0 (that is a separate article), and the following conf needs to exist to pass br0 to the VM. I am using qemu’s bridge helper rather than creating the tap devices manually. br0 corresponds to the bridge name in both snippets below.

qemu bridge helper (this file won’t exist by default):
root@machina:~# cat /etc/qemu/bridge.conf 
allow br0
root@machina:~#
network bridging conf

There are lots of ways of doing this, but this is mine. If you choose to go this route, install bridge-utils with apt.

root@machina:~# cat /etc/network/interfaces
auto lo
iface lo inet loopback

iface eth0 inet manual
auto br0
iface br0 inet dhcp
bridge_ports eth0
root@machina:~#

Step 4: VM Start Script

Script I run. Interesting parts that will change for your setup are in bold.

#!/bin/bash
vfiobind() {
    dev="$1"
        vendor=$(cat /sys/bus/pci/devices/$dev/vendor)
        device=$(cat /sys/bus/pci/devices/$dev/device)
        if [ -e /sys/bus/pci/devices/$dev/driver ]; then
                echo $dev > /sys/bus/pci/devices/$dev/driver/unbind
        fi
        echo $vendor $device > /sys/bus/pci/drivers/vfio-pci/new_id

}

modprobe vfio-pci

for line in 0000:01:00.0 0000:01:00.1; do
vfiobind $line
done

sudo qemu-system-x86_64 -enable-kvm -M q35 -m 4096 -cpu host,kvm=off \
-smp 4,sockets=1,cores=4,threads=1 \
-bios /usr/share/seabios/bios.bin  -vga none \
-device ioh3420,bus=pcie.0,addr=1c.0,multifunction=on,port=1,chassis=1,id=root.1 \
-device vfio-pci,host=01:00.0,bus=root.1,addr=00.0,multifunction=on,x-vga=on \
-device vfio-pci,host=01:00.1,bus=root.1,addr=00.1 \
-drive file=/dev/vg-ssd/vm-win7,id=disk,format=raw,if=virtio \
-drive file=/dev/vg-ssd/vm-win7-slice2,format=raw,if=virtio \
-usb -usbdevice host:093a:2510 -usbdevice host:05ac:0204 \
-usb -usbdevice host:045e:028e \
-usb -usbdevice host:0d8c:000c \
-boot menu=on \
-netdev tap,helper=/usr/lib/qemu/qemu-bridge-helper,id=hn0 -device virtio-net-pci,netdev=hn0,id=nic1 \
-vnc :2


  • It is highly irresponsible of me to run this as root, but it’s easy. If the guest manages privilege escalation due to a bug in kvm/qemu (like the floppy driver one months back), your box might get rooted and/or fucked. Keep your qemu packages updated! It might help that I’m using Debian stable rather than arch, as qemu might only be updated for security patches rather than new features which could break this.
  • Without -vnc :2, this command requires a working GUI with SDL to run which sucks as I run this in screen from ssh. I also like being able to connect via VNC. This is not at all a boot menu or a gui interface to the VM, but rather a qemu debug command prompt. I recommend restricting access to this (port 5902) using iptables.
  • kvm=off stops qemu from advertising the fact that it is running KVM to the guest. This is needed for newer nvidia drivers as nvidia refuses to work if it thinks its a VM
  • -cpu host exposes all of the host CPUs to the VM nearly verbatim. From what I’ve read, this is the best option for performance.
  • I’m giving it 4GB of ram (I have 16GB on the host) which is apparently plenty.
  • The path to the seabios binary changes slightly per debian qemu release (dpkg -L seabios | grep bios.bin)
  • I store my VM as LVM LVs/slices on an SSD. I hear that passing raw block devices (eg /dev/sd$X) to VMs doesn’t fare well, and I like being able to carve up the SSDs into other block devices for other VMs/etc. There’s also a possibility that using an LVM LV slightly avoids filesystem overhead you’d get if you were using a sparse file on ext4/etc.
  • -boot menu=on probably does not need to be there but I like the verbosity it gives during the boot process
  • That vfio bind function has been copy/pasted around various other articles.
  • The modprobe stanza might not be needed.

During my install, I used the following. After I installed all of the virtio drivers, I stopped using the realtek nic and ide disks:

sudo qemu-system-x86_64 -enable-kvm -M q35 -m 4096 -cpu host,kvm=off \
-smp 4,sockets=1,cores=4,threads=1 \
-bios /usr/share/seabios/bios.bin  -vga none \
-device ioh3420,bus=pcie.0,addr=1c.0,multifunction=on,port=1,chassis=1,id=root.1 \
-device vfio-pci,host=01:00.0,bus=root.1,addr=00.0,multifunction=on,x-vga=on \
-device vfio-pci,host=01:00.1,bus=root.1,addr=00.1 \
-drive file=/dev/vg-ssd/vm-win7,id=disk,format=raw -device ide-hd,bus=ide.0,drive=disk \
-drive file=/dev/vg-ssd/vm-win7-slice2,id=disk2,format=raw -device ide-hd,bus=ide.1,drive=disk2 \
-usb -usbdevice host:093a:2510 -usbdevice host:05ac:0204 \
-boot menu=on \
-netdev tap,helper=/usr/lib/qemu/qemu-bridge-helper,id=hn0 -device rtl8139,netdev=hn0,id=nic1 \
-drive file=/srv/ssd/misc/vm/win7.iso,id=isocd -device ide-cd,bus=ide.1,drive=isocd

Appendix 1: screenshots!

  • My mac mini connected as a steam in-house streaming client to the win7 VM: link
  • Windows experience index: link
  • Speccy/device manager (seeing a geforce card listed with the VirtIO drivers is mad trippy: link
  • VirtIO drivers make the network cards think they’re 10gig: link
  • htop on host showing the qemu procs: link

Appendix 2: links

There are some very good docs on this subject, and the steps I am using here is shamelessy ripped from them, albeit tweaked a little. Highlights/credits:

  • Alex’s Wiki which should be treated as source of truth for the subject: http://vfio.blogspot.com/
  • Google spreadsheet containing list of supported/unsupported hardware: link
  • Forum thread with useful info: link

Moving from Android to iPhone/iOS

My last iPhone was in 2009, and I switched after around a year when I got sick of AT@T, which used to be the sole carrier for iPhones. Since then I used and loved the Motorola Droid and its Motorola successors. Yesterday, I took the plunge and got an iPhone 5S. Despite the iPhone 6 coming out next month, the feeling of nostalgia was too overbearing to make me want to wait.

Being a long term Linux on the desktop user, I jumped on the apple band wagon for computers around a year ago. Switched my primary desktop from Debian Unstable/sid on home-built hardware to a Mac Mini running OS  X. Later on, bought a macbook air. My day job provides me with a macbook pro and a RHEL desktop, which I choose to use headless via ssh/mosh. I’ve taken to the “Linux/BSD on servers and OS X on desktops” paradigm.

I don’t have any major complaints with OS X, mainly because most of the open source apps I used on Linux work just as well (Firefox, Thunderbird, Filezilla, Chrome, others) and my favorite CLI apps either come bundled (vim, screen, bash, ssh) or are easily installable with brew or compilable from source. You get the ability to use the best of open source, as well as apps which don’t run on Linux such as MS Office and the Adobe suite, without the headache of tweaking Wine. Setting up netatalk/AFP is also nicer and more integrated than using plain NFS to share files from my Debian NAS.

However, there are several complaints and gripes I have about iOS, and I felt like making a blog post to list them:

Things I don’t like about iOS:

– Can’t play OGG/FLAC. My music collection is a hodgepodge of mp3/wma/flac/m4a/ogg/flac, all of which Nightingale (and Rhythmbox) play without issue. That Python script I wrote to convert a ton of music files to low quality MP3 may finally come in handy.

– Can’t save non-picture files to the device, such as PDFs or tarballs or anything else you may want to occasionally save.

– Can’t browse filesystem. No external storage like an SD card or similar.

– No SwiftKey alternative. I hear that a SwiftKey iOS port is in development, and I’m looking forward to it.

– No app privilege limitation or ability to see what functionality of your phone is given to apps. I don’t particularly care that much though.

– Can’t transfer files/pictures via Bluetooth. I had gotten accustomed to taking a picture and using the bluetooth file transfer app in OS X to get them off my phone. Emailing pictures I take to myself is a bit of an inconvenience.

– Airdrop can’t copy files between OS X and iPhones. I had guessed there would be some form of nice integration between the two platforms, aside from iTunes. Luckily FaceTime is immune to this limitation.

– No 4chan browser apps in appstore. Mimi for android is fantastic but apparently apple kicked off all equivalent apps years ago. It’s a little tempting to make a 4chan browser in Swift and see my luck for getting it added.

– I don’t think you can install arbitrary apps in same way you can on android by copying over a .APK package and accepting the security warnings.

– No floating chat heads in Facebook Messenger. I assume this is due to less functionality being given to apps.

– NSA is probably watching everything I do, but this con likely applies to Android devices as well.

The pros:

– Finger print unlock. I didn’t know it came with this so it was a bit of a pleasant surprise when the setup wizard prompted for my thumb print. Makes waking it from sleep and authorizing purchases very convenient.

– Higher quality apps. The apps that have their Android equivalents are more polished. I attribute this more to app devs feeling that there may be more iPhone users than android users, or that they’re just more likely to pay for apps. Examples: Uber, Yelp, Facebook, Wayze, Kindle, others.

– The device (iPhone 5S) itself is beautifully made. Metal case + glass screen. The two android models I’ve had were just plastic, and I feel that’s how most of them are. This is also a con as it’s more likely to crack and break whereas I put my droids through hell without their screens getting cracked.

– Lightning connector is better than micro USB. Akin to the new power connectors for macbooks, it doesn’t have a “right side up” way of connecting.

– Camera/photo app offers cropping and adding filters to pictures. I imagine that newer android versions have this built in but I haven’t looked.

– FaceTime is awesome.

– GoogleHangout app provides good enough access and integration to gchat, and the ability to add google accounts to the phone’s internal account system provides easy access to my google contacts.

Conclusion

The restrictions and missing features are likely all “by design.” It’d really suck if Apple applied this approach to the same extent to OS X.

I’m likely going to use the iPhone 5S for a year or so and then go back to an android device made by Motorola.

Deleting SVN Revisions

Say you have a large SVN repo with 617 commits. You want to physically delete the last 6 so you’re back to r611. You do not want the data contained in these revisions to exist so svn revert is not appropriate.

The most elegant way of killing off r612-r617 is to make a SVN dump up until revision r611 and then restore from it.

Dump the server-side SVN folder and then move it aside:

svnadmin dump myrepo/ -r r1:r611 > myrepo.dump
mv myrepo myrepo.old

Recreate a fresh repo and import the dump
svnadmin create myrepo
svnadmin load myrepo < myrepo.dump

You’re done.

desktop notifications for irssi nick highlights

I am a long term user of screen+irssi, a quite common way of using IRC for unix-inclined people neckbeards. One problem with this approach is that you will not be notified of events such as nick highlighting and PMs outside of your terminal window.

A quick hack is to use the fnotify irssi script to write highlights to a text file, and then a quick shell one liner to continually read events (lines) from this file and alert you via the gui. This post assumes basic knowledge of irssi, which I’m not going to cover here.

Install fnotify:

wget -P ~/.irssi/ https://raw.github.com/rndstr/fnotify/master/fnotify.pl

Run it inside irssi:
/run fnotify
[00:16] ~~~Irssi: Loaded script fnotify

Run this on your desktop and let it run indefinitely, and you’ll enjoy being notified of important events instead of finding them after the fact:

tail -n0 -f .irssi/fnotify | xargs -I{} xmessage "{}"

Protip: the xmessage command is a really ugly X11 built-in command and is primarily suited to minimal window managers such as fluxbox. Its notification popups will look quite out of place in a full blown desktop such as Gnome or KDE; using a different command such as notify-send or similar may be more appropriate.

Realtime stats of dd

There are at least two ways of getting the progress of the dd command. One is sending the dd command the -USR1 kill signal, which will cause it to print out its current progress to stderr:

kill -USR1 `pidof dd`

The other way is to examine the fdinfo file (either 0 or 1) for the dd process under /proc to see how much data has currently been copied. This is more efficient and way faster than sending dd a signal as it’s pulling directly from /proc and instead of waiting for dd to catch the signal.

root@debian:~# printf '%0.3fGB\n' $(bc -l <<< "$(awk '{if ($1 ~ "pos") print $2}' /proc/`pidof dd`/fdinfo/0) / 1073741824") 15.310GB root@debian:~#

Run it in a loop for stats every few seconds:

while :; do clear; printf '%0.3fGB\n' $(bc -l <<< "$(awk '{if ($1 ~ "pos") print $2}' /proc/`pidof dd`/fdinfo/0) / 1073741824"); sleep 2; done

Drastically increase mkfs.ext4 speed

Every now and then, you might want to create an ext4 filesystem on a block device spanning several terabytes, and this is almost always a really long process, taking up to several hours or even days.

There is a little known trick that can significantly reduce the amount of time needed to create ext4 filesystems:

mkfs.ext4 -E lazy_itable_init=1

The lazy_itable_init flag is default on newer versions of e2fsprogs, and the above snippet works on systems as old as Centos5.